Category Archives: Programming

Unbrick a counterfeit FTDI chip under Linux

I recently purchased a Serial-to-TTL adapter at the Amazon Marketplace for programming of micro-controllers, such as ATMega328P.
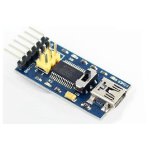
41vFeNmOOEL._SS300_The device worked very well until I plugged it into a machine running Windows. It turned out that it contains a counterfeit FTDI chip. The latest FTDI driver bricked the device by setting it’s product ID to “0000”. I understand that FTDI tries to react on faked chips, but I would say that this is quite conniving. I’m a victim of a counterfeit product and I had no chance to recognize a faked chip when I placed my order. FTDI promised to roll back and to stop distributing the malicious driver via Windows Update. However, what shall I do with a bricked device?

Fortunately, there is a method to reset the FTDI chip back to its original VID:PID of 0403:6001:

  • Plug-in the bricked device and check the ID with “lsusb” (if it is bricked, it shows 0403:0000).
  • To re-program the EEPROM, download ft232r_prog from ft232r_prog (v1.24).tar.gz and extract it to a folder. To compile the program, make sure to have libftdi-dev installed on your system.
  • After building the program, run:
sudo ./ft232r_prog --old-pid 0x0000 --new-pid 0x600
  • Now, unplug and re-insert your USB device and run “lsusb” again.  It should show the proper id of 0403:6001. The device should show up again as ttyUSB0.
Home-Automation using 433Mhz RC-Sockets

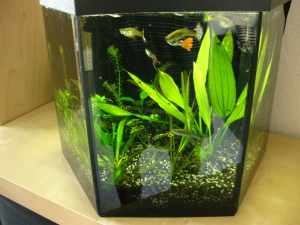
The small 35 liters fish tank in my living room is illuminated with a 6400 K energy-saving bulb. The light is controlled by a power outlet with a build-in digital timer. Unfortunately, the timer is somewhat complicated to program. Since it is not backed with a battery, one is losing all settings each time it is being disconnected. Therefore I wanted to control the light in a more convenient manner.

IMG_6847

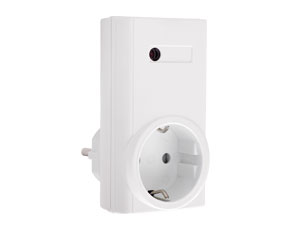
Recently, I stumbled upon a kit of cheap (less than 10 €) 433 MHz RC power sockets. I soon had in mind to let my RasPi server take care about the fish tank illumination by connecting one of these sockets to the aquarium.G550694Each socket has a row of ten dip switches on its backside, in order to set a system code and to assign it to one out of four buttons on the remote control (A – D). The socket communicates at a frequency of 433 MHz, using ASK modulation. Although it would be possible to solder some wires to the remote buttons, directly connecting them with RasPi’s GPIO header, it is much more safe and convenient (and consuming less GPIO pins) to control the sockets using a 433 MHz transmitter.

433 MHz transmitter

PDR_0195It is important to chose a transmitter capable to communicate by ASK-, rather than FSK modulation (such as the HOPERF RFM12B). It requires only one GPIO pin to talk to Raspberry and can be safely wired to +5 V, since we’re not reading anything from the GPIO pin.

Download and install rcswitch-pi

For transmitting signals to the rc-switches, I downloaded the following code to my Pi:

$ git clone https://github.com/r10r/rcswitch-pi

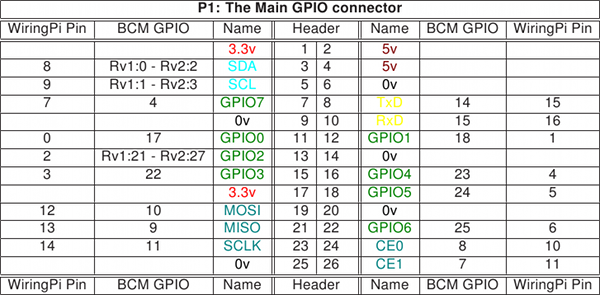
in send.cpp I changed the line reading int PIN = 0; to the GPIO pin connected to the transmitter. GPIO numbering is done according to the WiringPi library:

gpio1Then, I typed “make”, chmod 755 and moved the “send” program into my binary PATH (e.g. /usr/local/bin).

Dynamic webcam control using (py)ephem

Time-dependent webcam control

For taking still images with a webcam looking outside my sleeping room window, I’ve attached a Logitech C510 to my RasPi. At first, I used the fswebcam program to acquire still images, which can be easily configured using a fswebcam.conf file as follows:

quiet device v4l2:/dev/video0
input 0
skip 50
palette MJPEG
background
resolution 1600x1200
set "White Balance Temperature, Auto"=1
set "Exposure, Auto"=3
set "Backlight Compensation"=1
#set "sharpness"=100
#set "gain"=0{c7f7cb1468c0d02af358b3ce02b96b7aadc0ce32ccb53258bc8958c0e25c05c4}
#set "exposure"=1
#set "brightness"=35{c7f7cb1468c0d02af358b3ce02b96b7aadc0ce32ccb53258bc8958c0e25c05c4}
#set "contrast"=10{c7f7cb1468c0d02af358b3ce02b96b7aadc0ce32ccb53258bc8958c0e25c05c4}
#set "saturation"=60
#set hue=10
#top-banner
#font /usr/share/fonts/truetype/msttcorefonts/arial.ttf
title "RasPi-Cam"
timestamp "{c7f7cb1468c0d02af358b3ce02b96b7aadc0ce32ccb53258bc8958c0e25c05c4}d-{c7f7cb1468c0d02af358b3ce02b96b7aadc0ce32ccb53258bc8958c0e25c05c4}m-{c7f7cb1468c0d02af358b3ce02b96b7aadc0ce32ccb53258bc8958c0e25c05c4}Y {c7f7cb1468c0d02af358b3ce02b96b7aadc0ce32ccb53258bc8958c0e25c05c4}H:{c7f7cb1468c0d02af358b3ce02b96b7aadc0ce32ccb53258bc8958c0e25c05c4}M:{c7f7cb1468c0d02af358b3ce02b96b7aadc0ce32ccb53258bc8958c0e25c05c4}S ({c7f7cb1468c0d02af358b3ce02b96b7aadc0ce32ccb53258bc8958c0e25c05c4}Z)"
jpeg 50
save /var/www/data/snaps/snap.jpg

Some settings required careful tweaking, since most webcams are optimized for indoor use. Although the settings above resulted in pictures of reasonable quality, I noticed that they were pretty much overexposed on bright sunny days. And they were far too dark at night. It turned out that the auto exposure function of my webcam is unable to deal with changing light conditions.

Therefore I did some research on how to change the settings dynamically, depending on time of day. It turned out to be a simple task using some python scripting.