If you don’t want to spend much money for a RasPi housing, the Zen X Paper Case might be something for you. All you need is a sheet of A4 paper, a cutter knife and a printer.

The construction paper can be downloaded as PDF from http://arbofaktur.de.
If you don’t want to spend much money for a RasPi housing, the Zen X Paper Case might be something for you. All you need is a sheet of A4 paper, a cutter knife and a printer.
The construction paper can be downloaded as PDF from http://arbofaktur.de.
As reported here, I recently purchased a LiPo Rider Pro in order to charge my gadgets while I’m outdoor. I’ve connected a 2000 mAh LiPo battery and a 3W solar panel. Since the LiPo Rider Pro Board was delivered without a housing, I placed the board into a small box for protection during transport. However, the USB ports and the test button were not accessible anymore and the charge/ok status LEDs were not visible.
Therefore, I decided to build a “sandwich” structure around it, just placing two acrylic glass pieces onto top and bottom of the board.
As you probably know, one can overclock the RasPi to 1 GHz without losing its warranty given that the temperature of the device does not reach more than 80 °C. My RasPi runs at 950 GHz, since it crashed with the highest possible settings. To do so, I’ve changed my /boot/config.txt as follows:
#uncomment to overclock the arm. 700 MHz is the default.
arm_freq=950
force_turbo=0

# for more options see http://elinux.org/RPi_config.txt
gpu_mem=128
gpu_mem_256=160
gpu_mem_512=316
cma_lwm=16
cma_hwm=32
core_freq=250
sdram_freq=450
over_voltage=6
avoid_safe_mode=1
A complete list of configuration options for the /boot/config.txt can be found on elinux.org.
Since more heat is generated by overclocking, I placed my RasPi into an enclosure lacking a lid. For better heat dissipation, I glued heatsinks to the ARM processor. You can check the CPU temperature with:
$ cat /sys/class/thermal/thermal_zone0/temp
Under idle conditions, the temperature on the overclocked Pi is about 36 °C, whereas my Pi within the Pibow without heatsink and default settings is running at 48 °C.

The settings above also activate dynamic memory sharing for RAM and GPU. More RAM for the GPU will be automatically assigned when you’re starting the Xserver.
If you want to free more RAM, you can disable kernel modules if you don’t need them. For example, if you’re not going to use sound, blacklist the corresponding snd* modules in /etc/modprobe.d/raspi-blacklist.conf.
# blacklist spi and i2c by default (many users don't need them)

#blacklist spi-bcm2708
#blacklist i2c-bcm2708
blacklist leds_gpio
blacklist led_class
blacklist snd_bcm2835
blacklist snd_pcm
blacklist snd
blacklist snd_timer
blacklist snd_page_alloc
blacklist snd_rawmidi
blacklist snd_seq_device
blacklist snd_usb_audio
blacklist snd_hwdep
blacklist snd_usbmidi_lib
If you want to run your Pi 24/7, you may want to add watchdog support, which automatically resets your Pi on system errors. For installation of the watchdog do:
$ sudo modprobe bcm2708_wdog
$ echo "bcm2708_wdog" | sudo tee -a /etc/modules
$ sudo apt-get install watchdog
and edit few lines in /etc/watchdog.conf to
watchdog-device        = /dev/watchdog
max-load-1             = 24
temperature-device     = /sys/class/thermal/thermal_zone0/temp
max-temperature        = 75
The watchdog will be activated on next reboot.
There are a lot of tutorials out there on how to install the music player daemon (MPD) on a Raspberry Pi. Therefore, I’ll not describe it here in detail. On a freshly installed Debian Wheezy it should work out-of-the-box. An “apt-get install mpd” and editing /etc/mpd.conf should do the trick.
However, if you wish to control MPD with your browser using the FireFox Minion Plugin, you’ll certainly face the problem that it’s configuration dialog for the server’s IP-address/ port number appears to be broken.
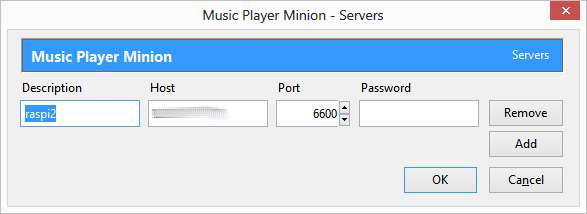
Whatever you enter into the dialog will be ignored, and Minion will stay disconnected. It’s a bug, not a feature!
In order to set the IP-address and port number you have to type about:config into Firefox’ address bar and search for the string extensions.mpm.server.

Then, double-click on the entry and enter the desired IP:Portnumber.
Furthermore, depending on where you store your audio files (I keep them on a USB stick), file permissions can be an issue, if MPD is unable to see your files. Make sure that the folder containing the audiofiles is readable for the desired users.
… and I completely migrated the contents of my old homepage. Furthermore, I almost completed some tutorials. Hope you enjoy it – looking forward to your feedback.