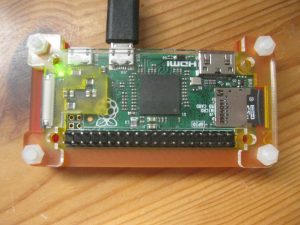
Thanks to the Maker Faire Berlin on 1st and 2nd of October, I was able to purchase a Pi Zero board, which currently is out of stock at most distributors. Indeed, it is a nice little board for experimenting with the GPIO header.
In contrast to other Pi versions, it features a micro USB port, which is capable to connect in USB OTG mode (On-The-Go) to a host-PC. Thus, there is no need for a power supply and WiFi dongle, since communication with the host-PC is established through USB networking. This is especially useful if you want to use the Pi Zero in headless mode, for example in a classroom environment already equipped with desktop PCs and/or notebooks.
There are already other tutorials which describe how to enable USB OTG mode on a Pi Zero. However, I’ve been struggling with configuration of a fixed IP and internet/ network connection through USB on the Pi Zero. So here are some helpful instructions on how to achieve this:
OTG setup
The latest Raspbian release (2016-09-23) ships with kernel 4.4.x and modules supporting OTG mode. For older distributions it is required to do a sudo apt-get update && sudo apt-get dist-upgrade before configuring OTG mode.
Then, enter the /boot directory and append this line to /boot/config.txt:
dtoverlay=dwc2
To the end of the cmdline.txt (after rootwait), add ‘modules-load=dwc2,g_ether’. It is also highly recommend to add a fixed hardware address for both Pi Zero and host-PC, i.e. ‘g_ether.dev_addr=AA:BB:CC:DD:EE:FF g_ether.host_addr=AA:BB:CC:DD:EE:FF”, otherwise, the g_ether module assigns a random HW and IP address to usb0 during boot. This is important, if you want to let your host-PC automatically (re)-connect to the Pi-Zero. With a random address, the Network Manager will recognize the Pi Zero as a new device each time it reboots.
dwc_otg.lpm_enable=0 console=serial0,115200 console=tty1 root=/dev/mmcblk0p2 rootfstype=ext4 elevator=deadline fsck.repair=yes rootwait modules-load=dwc2,g_ether g_ether.dev_addr=AA:BB:CC:DD:EE:FF g_ether.host_addr=AA:BB:CC:DD:EE:FF
As an alternative, you can pass these options to the g_ether module in /etc/modprobe.d/g_ether.conf
options g_ether host_addr=AA:BB:CC:DD:EE:FF dev_addr=AA:BB:CC:DD:EE:FF
Make sure to chose an address, that doesn’t collide with existing hardware on your host-PC.
[update]
I had some issues with the fixed HW address. Although configured in both /boot/cmdline.txt and /etc/modprobe.d/g_ether.conf, it changed on each second cold boot, so that NetworkManager on the Linux host did not automatically re-connect usb0. To fix this issue, I added this line into /etc/rc.local:
ifconfig usb0 hw ether aa:bb:cc:dd:ee:ff
While attending the Raspberry Jam Berlin, James Mitchell pointed out, that this behavior can be changed by placing a udev-rule into /etc/udev/rules.d/90-zero-otg.rules. If you want to connect a single PiZero to your host, the udev rule can be used to change the network interface name for the connecting Pi Zero, based on the VendorId/ProductId which is detected as soon as it connects to the host machine. (Thanks James!)
SUBSYSTEM=="usb", SYSFS{idVendor}=="0525", SYSFS{idProduct}=="a4a2", NAME="usb0"
If you wish a fixed IP address for your Pi Zero, you will need to run (on the Pi Zero):
sudo echo -e "interface usb0 \nstatic ip_address=169.254.64.64" >> /etc/dhcpcd.conf
On your host-machine, make sure to have the Bonjour service installed and running. Under Linux, it is provided by the avahi-daemon. You may also need the avahi-dnsconfd.
Under Windows Bonjour is not available as a standalone installer, but is part of iTunes and the latest version can be extracted from the Install.exe using 7zip.
