HTTP-Server configuration
As I have mentioned in my RasPi wordpress tutorial, you should install a light-weight http damon, such as lighttpd or nginx due to limited resources in terms of CPU and RAM. However, with the right plugins and tweaks it should be possible to serve your content within less than 3 seconds.
E-mail Server
Once you have registered a subdomain and DynDNS for your Raspberry Pi, you may want to use your server as a smarthost for your local e-mail. This is particularly useful, since some services on your Pi, such as cron and even WordPress, send security and status messages to the admin account. If you haven’t configured a Mail Transport Agent (MTA) on your Pi, mail will be only delivered locally and you have to log-in in order to retreive it.
Due to the limited resources available, I decided to use exim4 as MTA on my RasPi. Installation of exim4 is straightforward and requires not more than an:
$ sudo apt-get install exim4
During the installation process, a self-signed SSL certificate is generated. Direct delivery of messages to the recipient’s mail server nowadays doesn’t work any more, due to the provider’s spam filter. Therefore, you still need an e-mail account at your provider, which is used for outgoing e-mail. To configure exim4 as a smart host, enter:
$ sudo dpkg-reconfigure exim4-config
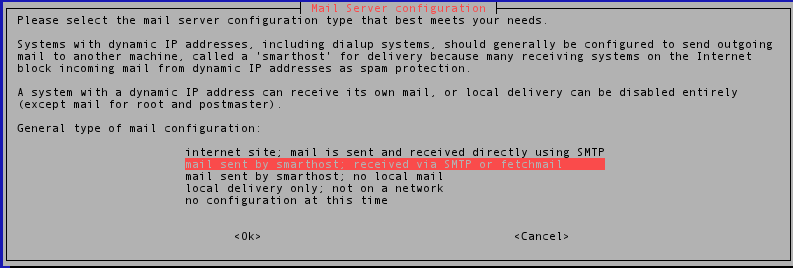
Select “mail sent by smarthost; received by SMTP or fetchmail” from the configuration dialog.
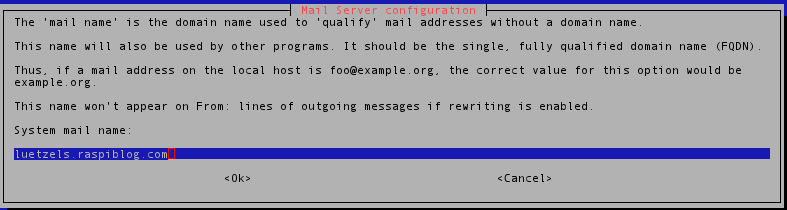
 In the next window, enter the domain name (FQDN) of your Raspberry Pi. You should use the subdomain which you have registered with your DynDNS provider.
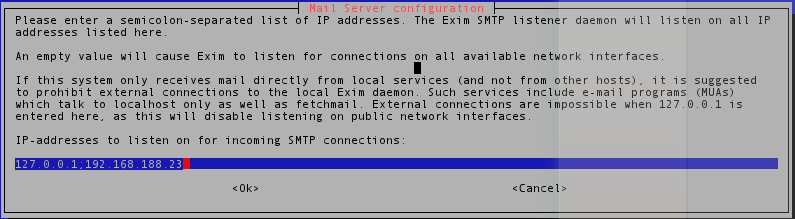
 The exim4 SMTP server will listen on port 25 for incoming mail. Thus, it is necessary to enter the IPv4 address of RasPi’s network interface. If your RasPi receives its address through DHCP, you should tell your router to issue always the same address for your Pi. It is important to enter both 127.0.0.1 and the IP of the Pi in your home network.
 In the next configuration dialog you can set the domains for which your Pi should be responsible for. Again, enter the subdomain registered with your DynDNS provider and the hostname of your Pi in your home network.