The Fritzing super upgrade kit included a 16×2 LCD display. One of my first projects was an Arduino UNO thermometer, showing the temperature read from an analog LM335Z sensor on two 7-segment LED displays. With the LCD display one can add more digits to the temperature reading, because there are two rows of 16 characters available.
The Adafruit learning system provides an excellent tutorial and sketches on how to connect the LCD to the Arduino UNO. In the tutorial, a TMP36 temperature sensor and photoresistor is connected.
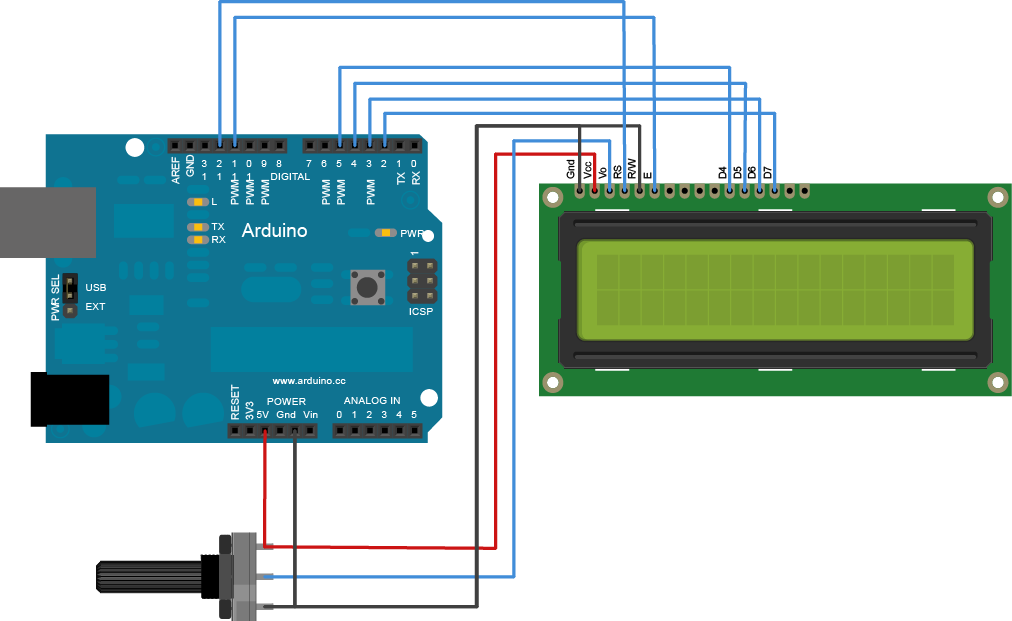
Wiring is straightforward and requires no other parts than few jumper wires and a 10k variable resistor to adjust display contrast. Pins 7-10 of the LCD are not used.
| LCD Display Pin | Arduino Pin |
| 1. VSS | GND |
| 2. VDD | +5V |
| 3. V0 | to variable 10k resistor |
| 4. RS | Digital 12 |
| 5. R/W | GND |
| 6. E | Digital 11 |
| 11. DB4 | Digital 5 |
| 12. DB5 | Digital 4 |
| 13. DB5 | Digital 3 |
| 14. DB7 | Digital 2 |
| 15. Anode (Display light, optional) | +5V |
| 16. Kathode (Display light, optional) | GND |
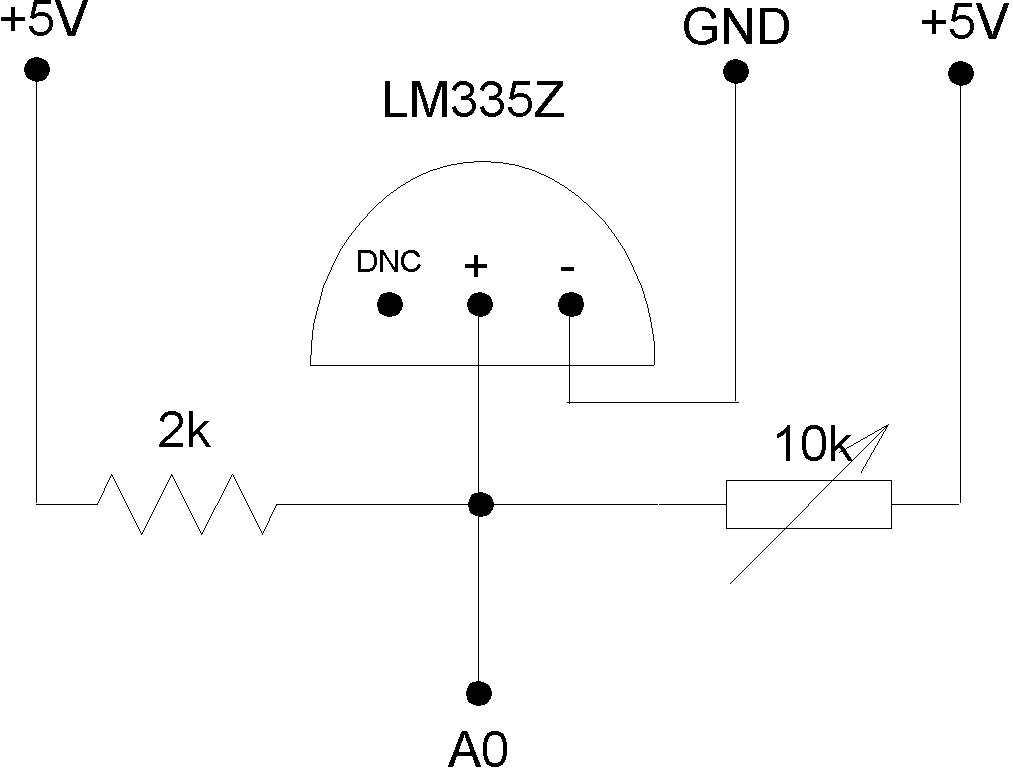
Instead of TMP36, I’ve connected a LM335Z analog temperature sensor to the A0 pin of my Arduino. The wiring diagram is exactly the same as for the project using numeric 7-segment LED displays.