Due to a hardware failure, only older blog articles are temporarily available on this page. We are working to restore the newer blog posts. Some links may not work anymore. Please be patient a little longer! We’re working on it.
Category Archives: Uncategorized
Device management with qbee.io for the Raspberry Pi in the classroom
For some years now we have set up a classroom in our school with 12 Raspberry Pi work places. The devices are heavily used in everyday school life. Our Raspberry Pis are mainly used in physics classes, but sometimes also for programming or hardware and electronics tinkering e.g. with the Arduino.
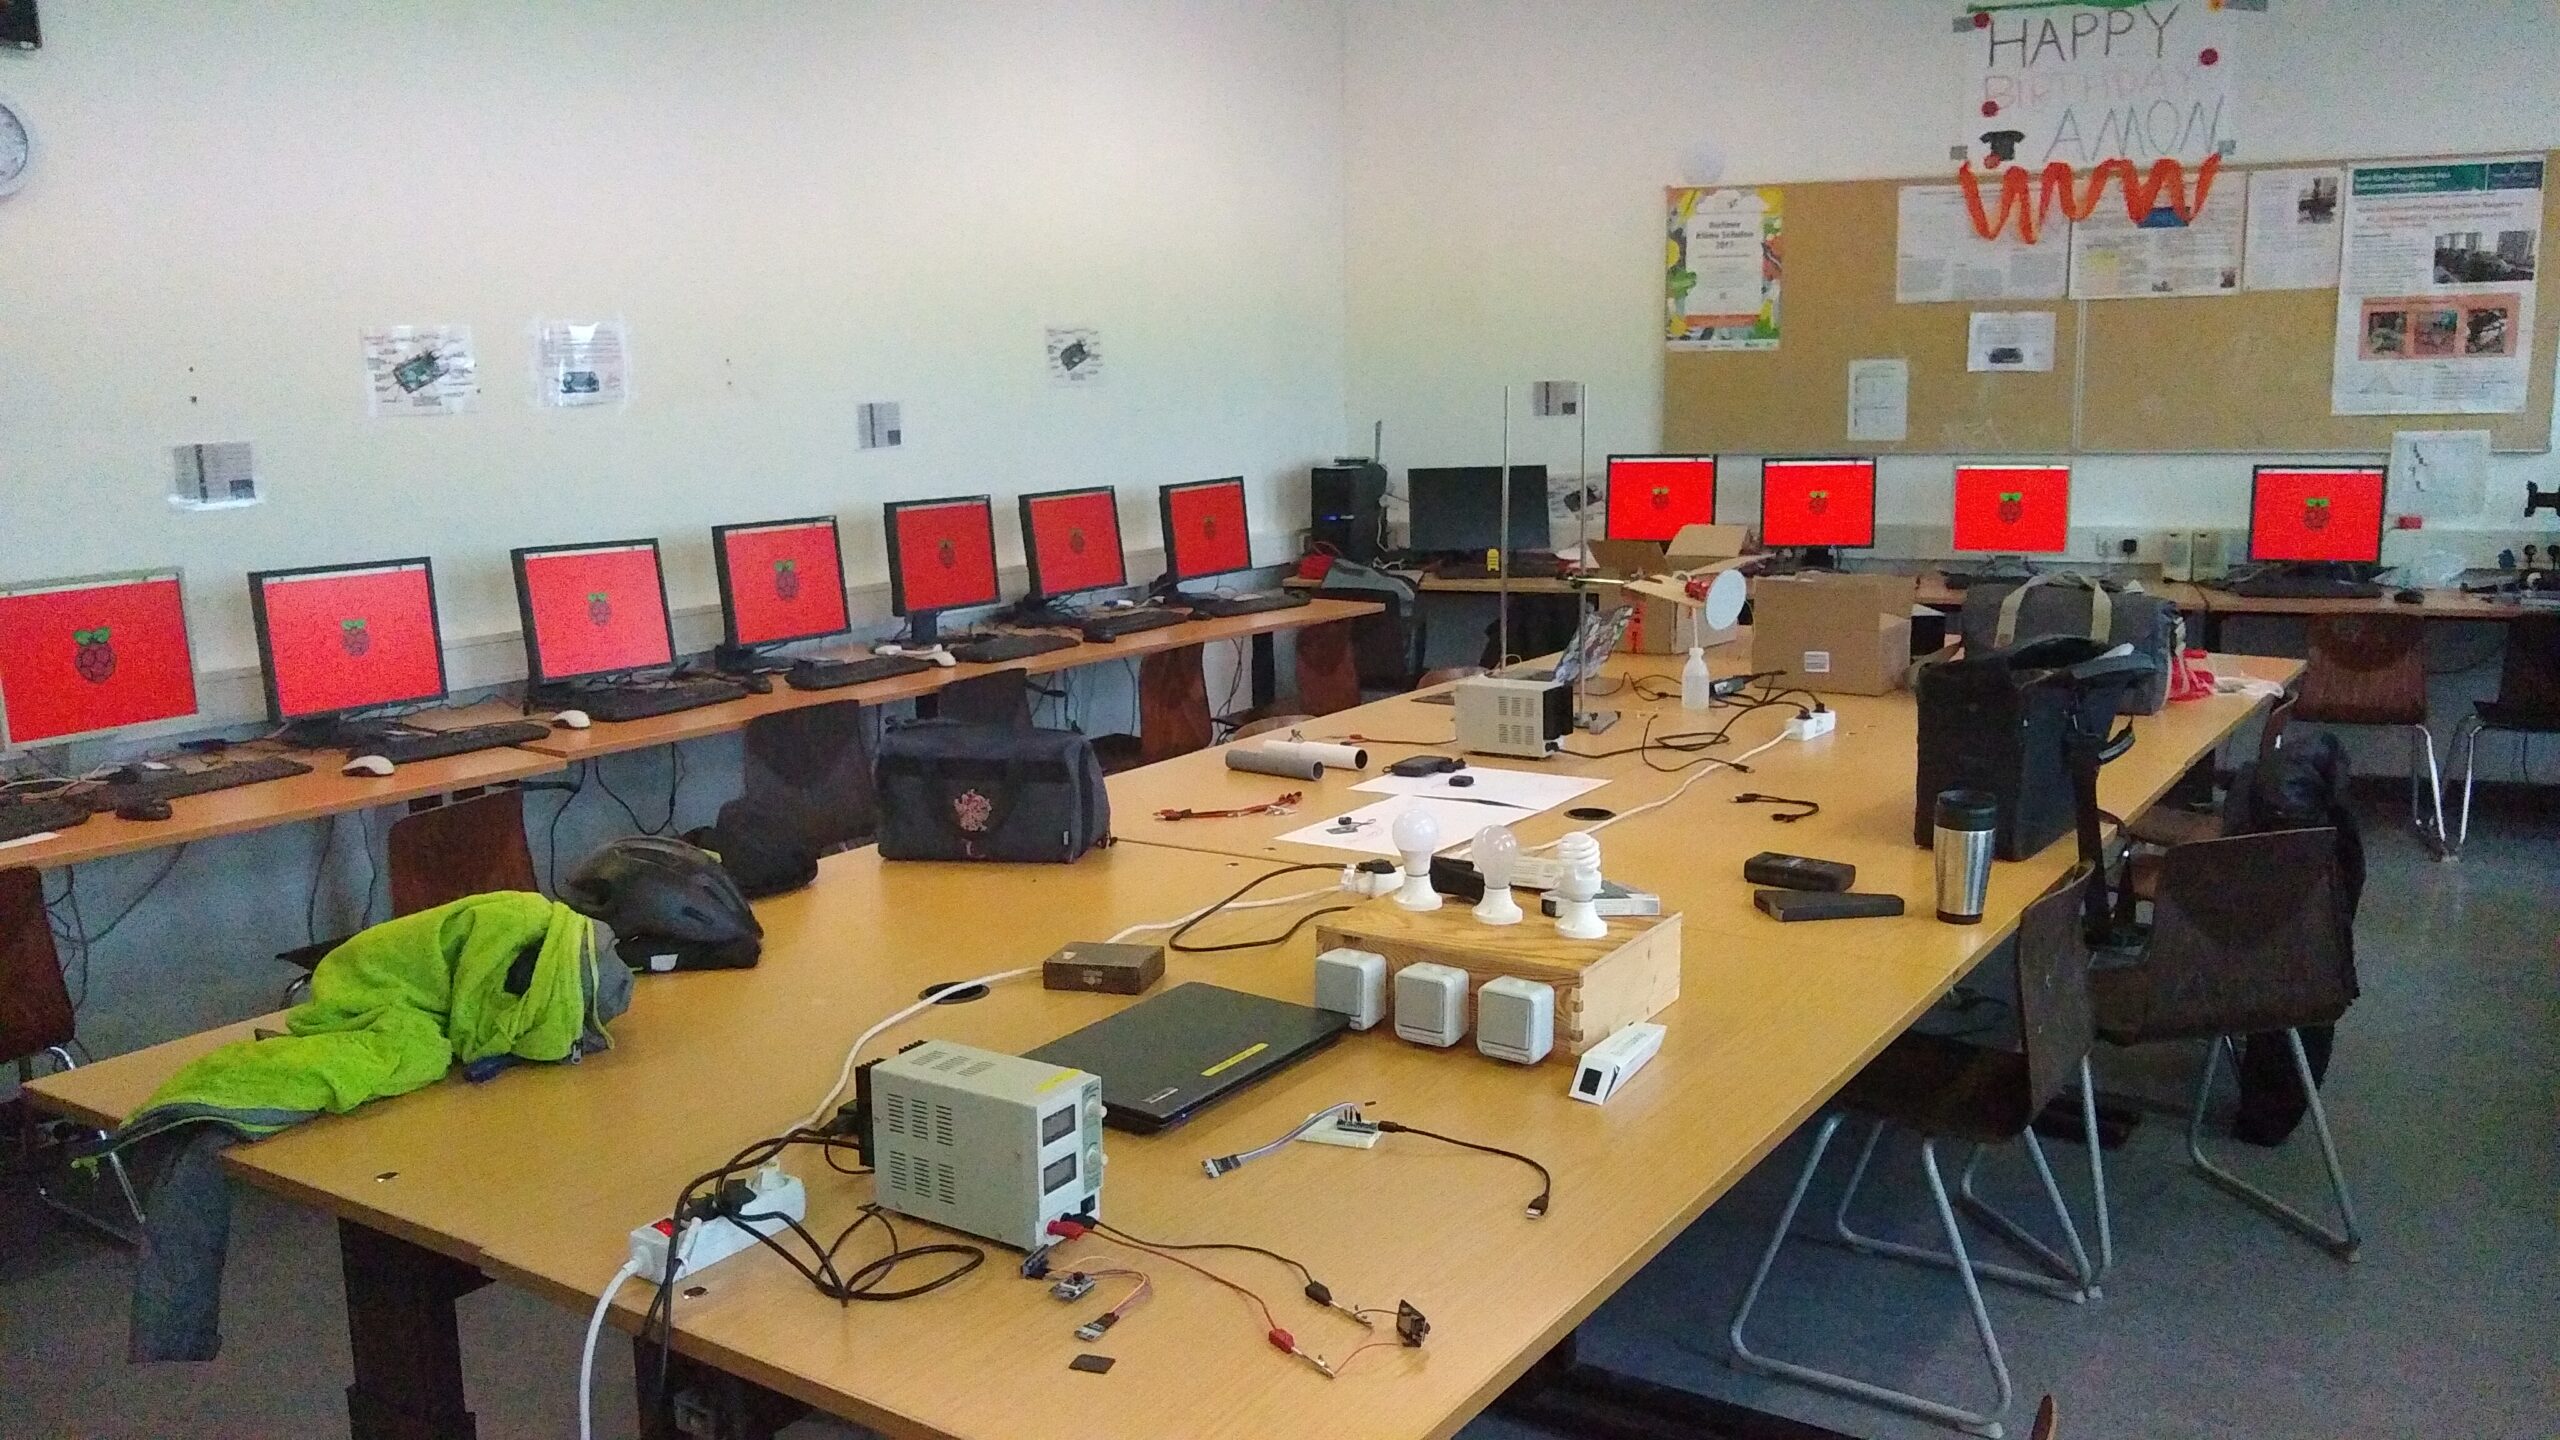
How to best use the devices for school lessons was a long learning process, because again and again the students changed important system settings on the devices so that they no longer worked properly or could no longer boot. Although the Raspberry Pi4 has become significantly faster than the old models, setting up the Raspberry OS takes a lot of effort and can be a tedious task. System updates take a lot of time and the slow internet connection at our school means that updates often take many hours. During this time, you cannot always stay on site as a teacher, but now we have found a way to maintain the devices from afar.
qbee.io
The Norwegian startup qbee AS has provided our school with a test version of remote maintenance software for embedded devices, with which all important settings can also be made from home. It allows us to manage all our embedded Linux -based devices from one dashboard.
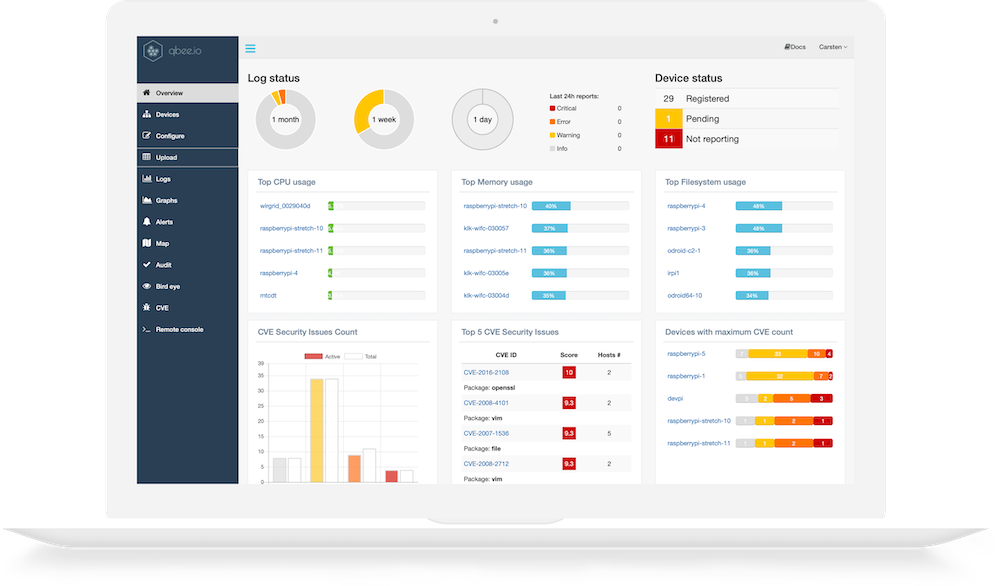 The platform is designed to help users achieve four major things including: remote access, security, automation, and device monitoring. For remote access, qbee.io allows connections over SSH but it can also map any other port such as web servers on 80/443 and Node-Red on 1880 or VNC. Out of the box, qbee routes all ports through a VPN connection using https on port 443. For Security, qbee.io performs actions like check firmware libraries for CVE vulnerabilities, checks if newly updated libraries are available and make suggestions on upgrades, check which users are active and how old the passwords are (people tend to forget to remove pre-configured support accounts), rotate ssh keys, and close all incoming ports (ssh is routed through VPN). All of these actions and more are combined to ensure that deployments stay secure.
One of the delightful things about qbee is its vendor-agnostic nature which allows it to work without the need for software development or containers. It works via the use of a lightweight, secure qbee agent packages which when on your IoT deployment, constantly monitors your system, receiving state information from the qbee backend server and autonomously enforcing the received data in the field.
The qbee agent packages currently exist for all Debian based systems and can be custom created for any other Linux based distribution. The absence of software development activities in qbee deployment makes it not just easy and fast to deploy, but also increases the range of devices(Legacy or new) on which it can be deployed.
Qbee currently has 3 user plans including: “Small” which covers 1-25 devices at $4.30/month, “Medium” which covers 26-100 devices at $1.55/month, and “Large” which covers 101 – 250 devices at $0.90/month. According to Carsten Lehbrink, the CEO of qbee, it is planned to provide educational institutions with free licenses.
How to make the 1-wire bus more reliable on a Raspberry Pi
Thermal sensors, such as DS18B20 can be connected to the Raspberry Pi via 1-wire bus. However, the 1-wire bus is not implemented in hardware, but only as software emulation on GPIO4, which has some major disadvantages. The 1-wire data link is acting as a very long “antenna” which catches interference. All GPIO pins of a Raspberry Pi are directly connected to the CPU. So every interference cought on 1-wire bus is transported directly to the Broadcom SoC. Furthermore, the 1-wire protocol needs a very tight and time-critical signal generation, so it’s resource-consuming to communicate with 1-wire slaves and therefore highly unreliable if running on a non-real-time operating system.
I noticed that the DS18B20 sensors, which I have wired to my Raspberry, return at least once or twice a day bad temperature values, making it impossible to retrieve reliable max/min temperature data.
I recently stumbled upon a DS2482S-100 1-wire master breakout board that allows to control one or many 1-wire slave devices by simply sending I2C commands, relieving the task of generating the time-critical signals the 1-wire protocol requires. It provides bidirectional protocol conversion between an I2C master and 1-wire slave devices. The breakout board makes use of a DS2482S-100 converter, that is exclusively sold in a SO-8 package which doesn’t fit onto a breadboard.
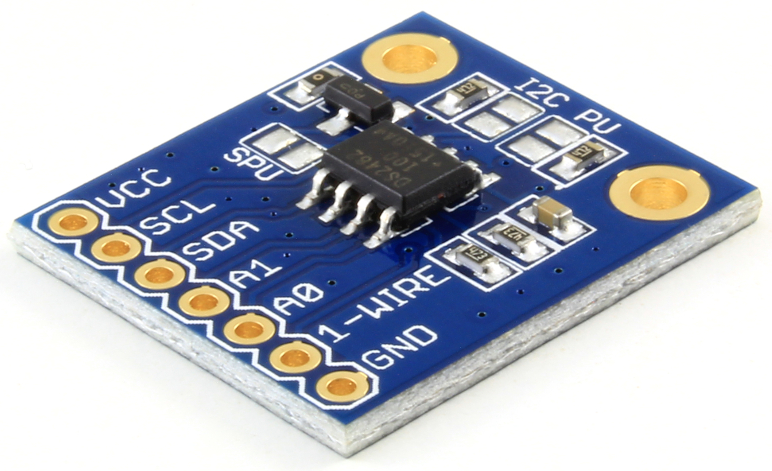 The breakout board is very simple to use. All you need to do is connecting VCC (3V3), GND, SDA and SCL to it’s counterparts on the Raspberry Pi GPIO header. As usual, the DATA pin of DS18B20 is connected to the pin labeled with “1-wire”. Don’t forget to connect a 4K7 pullup resistor between VCC and DATA of DS18B20. Continue reading How to make the 1-wire bus more reliable on a Raspberry Pi
Dear visitors,
due to a provider change I had to move my blog to a new domain:
http://raspberryblog.de
Please update your bookmarks!
The old url will be valid until the end of June.
Music Player Daemon (MPD) Workaround for the Firefox Minion Plugin
There are a lot of tutorials out there on how to install the music player daemon (MPD) on a Raspberry Pi. Therefore, I’ll not describe it here in detail. On a freshly installed Debian Wheezy it should work out-of-the-box. An “apt-get install mpd” and editing /etc/mpd.conf should do the trick.
However, if you wish to control MPD with your browser using the FireFox Minion Plugin, you’ll certainly face the problem that it’s configuration dialog for the server’s IP-address/ port number appears to be broken.
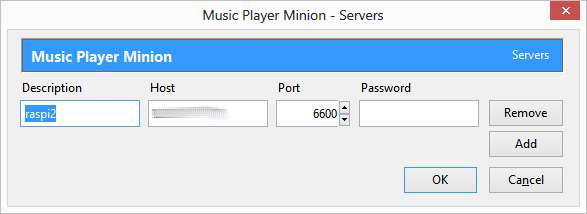
Whatever you enter into the dialog will be ignored, and Minion will stay disconnected. It’s a bug, not a feature!
In order to set the IP-address and port number you have to type about:config into Firefox’ address bar and search for the string extensions.mpm.server.

Then, double-click on the entry and enter the desired IP:Portnumber.
Furthermore, depending on where you store your audio files (I keep them on a USB stick), file permissions can be an issue, if MPD is unable to see your files. Make sure that the folder containing the audiofiles is readable for the desired users.