The small 35 liters fish tank in my living room is illuminated with a 6400 K energy-saving bulb. The light is controlled by a power outlet with a build-in digital timer. Unfortunately, the timer is somewhat complicated to program. Since it is not backed with a battery, one is losing all settings each time it is being disconnected. Therefore I wanted to control the light in a more convenient manner.

Recently, I stumbled upon a kit of cheap (less than 10 €) 433 MHz RC power sockets. I soon had in mind to let my RasPi server take care about the fish tank illumination by connecting one of these sockets to the aquarium.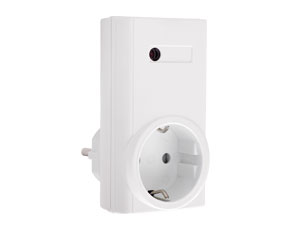 Each socket has a row of ten dip switches on its backside, in order to set a system code and to assign it to one out of four buttons on the remote control (A – D). The socket communicates at a frequency of 433 MHz, using ASK modulation. Although it would be possible to solder some wires to the remote buttons, directly connecting them with RasPi’s GPIO header, it is much more safe and convenient (and consuming less GPIO pins) to control the sockets using a 433 MHz transmitter.
433 MHz transmitter
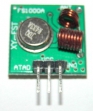 It is important to chose a transmitter capable to communicate by ASK-, rather than FSK modulation (such as the HOPERF RFM12B). It requires only one GPIO pin to talk to Raspberry and can be safely wired to +5 V, since we’re not reading anything from the GPIO pin.
Download and install rcswitch-pi
For transmitting signals to the rc-switches, I downloaded the following code to my Pi:
$ git clone https://github.com/r10r/rcswitch-pi
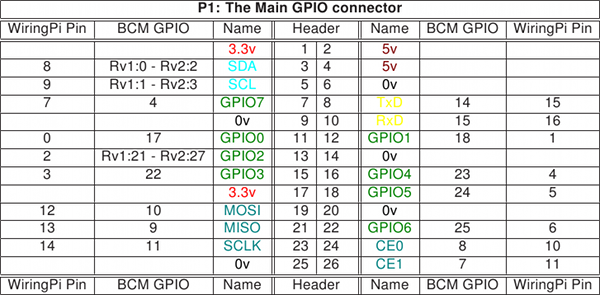
in send.cpp I changed the line reading int PIN = 0; to the GPIO pin connected to the transmitter. GPIO numbering is done according to the WiringPi library:
 Then, I typed “make”, chmod 755 and moved the “send” program into my binary PATH (e.g. /usr/local/bin).
 Speech recognition is an amazing feature for the Pi and if you ever wanted to know what “the answer to life, the universe and everything ” is, you should go for it!