How to configure RealVNC on a Pi with 3.5” LCD

With the release of a new Raspbian version (2016-09-23) RealVNC have ported their VNC server and viewer applications to Pi, and they are now integrated with the system and PIXEL desktop. With raspi-config, one can enable start of RealVNC at boot time. This is particularly useful, if you’re running your Pi headless a (without monitor), but still want to access the LXDE desktop. RealVNC usually works out of the box, but …
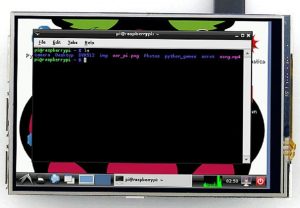
35lcdtft… it doesn’t, when you connect a non-standard display. I recently upgraded one of my Raspberry Pi’s with a 3.5” LCD touch screen, which connects through the GPIO header and has a resolution of 320×480 pixels. Unfortunately, with the display attached, VNCviewer’s desktop size also shrinks to 340×480 pixels which is very inconvenient to read when it is displayed on a 1920×1080 HDMI monitor. Scaling of the window makes its contents very blurry.

However, with some special settings, one can circumvent this problem:

Continue reading How to configure RealVNC on a Pi with 3.5” LCD
How to enable USB OTG mode on a Pi Zero

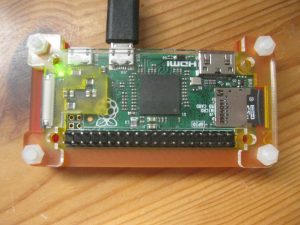
Thanks to the Maker Faire Berlin on 1st and 2nd of October, I was able to purchase a Pi Zero board, which currently is out of stock  at most distributors. Indeed, it is a nice little board for experimenting with the GPIO header.

IMG_8215

In contrast to other Pi versions, it features a micro USB port, which is capable to connect in USB OTG mode (On-The-Go) to a host-PC. Thus, there is no need for a power supply and WiFi dongle, since communication with the host-PC is established through USB networking. This is especially useful if you want to use the Pi Zero in headless mode, for example in a classroom environment already equipped with desktop PCs and/or notebooks.

There are already  other tutorials which describe how to enable USB OTG mode on a Pi Zero. However, I’ve been struggling with configuration of a fixed IP and internet/ network connection through USB on the Pi Zero. So here are some helpful instructions on how to achieve this:

Continue reading How to enable USB OTG mode on a Pi Zero

Setting up PS3 controllers on Retropie (Gasia/ Shanwan clones)

If you like retro-gaming you probably came across RetroPie, which allows to turn your Raspberry Pi into a retro-gaming machine.

RetroPie supports game-controllers of many different brands, however it can be difficult to configure them, especially if you chose a wireless (bluetooth) controller. I decided for a wireless Sony PS3 controller and purchased a pair of “compatible” devices from Aliexpress a.k.a. Gasia/Shanwan clones.

IMG_7667a

The RetroPie Wiki  provides some useful information on how to pair these controllers with a bluetooth dongle. At the moment RetroPie supports PS3 controllers using the sixad daemon, which is part of the QtSixA package.

The QtSixA  Sixaxis Joystick Manager can connect PS3 hardware, but it takes over bluez/ bluetoothd service and other bluetooth devices, so that keyboards or mice can’t connect when sixad is active.

Thus, I was wondering why there is no ‘native’ bluez support for PS3 devices. A Google search revealed that bluez comes with a ‘sixaxis’ plugin supporting only “genuine” PS3 controllers. However, I found on the gmane mailing list that bluez patches are currently under development, but none of them made it into an official or main developer branch, yet.

BlueZ PS3 support using the Sixaxis plugin

Fortunately Szymon Janc, one of the bluez developers, provided some patches for the OpenELEC.tv Mediacenter. [Update: 2016-09-28] However, development of OpenELEC.tv seems to be dead, since there were no updates for quite a while. Therefore, I do not expect that patches supporting other PS3 clones will be released soon.

Here is a short tutorial on how to use these patches for RetroPie and to fix the annoying PS3 Shanwan/Gasia pairing problem:

Using the ESP8266 module for the Internet of Things

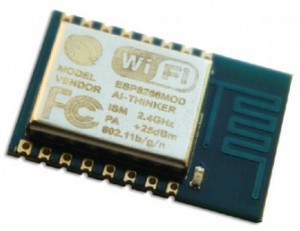
About two years ago, a cheap five dollar microcontroller has been entering the maker scene, featuring b/g/n wireless LAN.  The ESP8266 is manufactured by a Chinese company, called Espressif Systems and became soon very popular as a building-block for home-automation and IoT projects.These modules were distributed on  Ebay, the Amazon Marketplace or AliExpress for a few dollars. However, communication with most of the ESP8266 modules requires an external USB-to-Serial-Adapter and a special procedure to bring the device into “flash-mode”, which can be cumbersome in some cases, especially for beginners. With the brand-new WeMos D1 Mini, the setup was significantly simplified, so that it is as easy to use as an Arduino UNO.

esp8266-12-e1452522744313-300x231

Continue reading Using the ESP8266 module for the Internet of Things